This post is about adding spring security to spring boot actuators endpoints. We will be discusing about securing actuator endpoints by using properties file configurations as well as AuthenticationManagerBuilder. Apart from this we will also take a loook into how can we disable restrictions to certain endpoints that are by default restricted as per spring boot actuators.
Background
By default, there are 2 actuator endpoints, /health and /info, which are non restrictive and by default all other endpoints are secured such that only users that have an ACTUATOR role have access to them. Of course, you can override this default behaviour. You can define your custom role that have access to sensitive endpoints. All the actuator endpoints are by default exposed to context path but this again can be overriden and we will be doing that right in this post. So let us start by defining the project structure first.
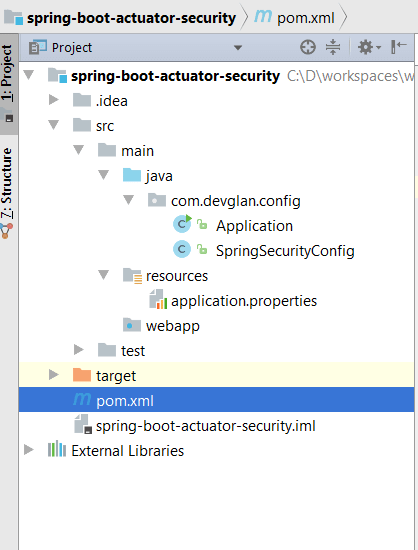
Project Structure
Maven dependency
You can check in the pom file that we are not including spring-boot-starter-security artifact now. Actually, to access restricted actuator endpoints with default role configuration, it is not required to have spring-boot-starter-security artifact. You can manage security with the properties configurations.
We will see how can we use this artifact to override actuator default behaviour later in this post.
spring-boot-starter-parent: provides useful Maven defaults. It also provides a dependency-management section so that you can omit version tags for existing dependencies.
spring-boot-starter-web: includes all the dependencies required to create a web app. This will avoid lining up different spring common project versions.
spring-boot-starter-tomcat: enable an embedded Apache Tomcat 7 instance, by default. We have overriden this by defining our version. This can be also marked as provided if you wish to deploy the war to any other standalone tomcat.
spring-boot-starter-actuator: Enables spring boot actuator features in spring boot.
<?xml version="1.0" encoding="UTF-8"?>
<project xmlns="http://maven.apache.org/POM/4.0.0" xmlns:xsi="http://www.w3.org/2001/XMLSchema-instance"
    xsi:schemaLocation="http://maven.apache.org/POM/4.0.0 http://maven.apache.org/xsd/maven-4.0.0.xsd">
    <modelVersion>4.0.0</modelVersion>

    <groupId>com.devglan</groupId>
    <artifactId>spring-boot-actuator-endpoints</artifactId>
    <version>0.1.0-SNAPSHOT</version>
    <packaging>war</packaging>

    <properties>
        <java.version>1.8</java.version>
    </properties>

    <parent>
        <groupId>org.springframework.boot</groupId>
        <artifactId>spring-boot-starter-parent</artifactId>
        <version>1.5.1.RELEASE</version>
    </parent>

    <dependencies>
	<dependency>
            <groupId>org.springframework.boot</groupId>
            <artifactId>spring-boot-starter-web</artifactId>
        </dependency>

	<dependency>
            <groupId>org.springframework.boot</groupId>
            <artifactId>spring-boot-starter-tomcat</artifactId>
        </dependency>
	<dependency>
            <groupId>org.springframework.boot</groupId>
            <artifactId>spring-boot-starter-actuator</artifactId>
        </dependency>

    </dependencies>

	<build>
            <plugins>
                <plugin>
                    <groupId>org.springframework.boot</groupId>
                    <artifactId>spring-boot-maven-plugin</artifactId>
                </plugin>
             </plugins>
         </build>

</project>
Defining Application class
@SpringBootApplication enables many defaults. It also enables @EnableWebMvc that activates web endpoints.
Application.javapackage com.devglan.config; import org.springframework.boot.SpringApplication; import org.springframework.boot.autoconfigure.SpringBootApplication; @SpringBootApplication public class Application { public static void main(String[] args) { SpringApplication.run(Application.class, args); } }
Now let us start our Application.java as a java application and check the actuator behaviour.
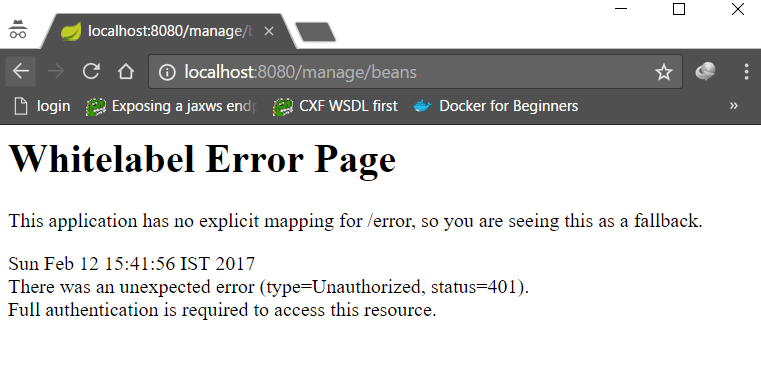
You should be able to access the actuator endpoint /health and /info at this moment at localhost:8080/health and localhost:8080/health. But once you try to access /beans or any other restricted endpoints you should ideally get an error message as Unauthorized access as below. This is because restricted endpoints require user to have ACTUATOR role by default to have access.
Now let us define our security parameters via properties.
Adding Management Security to Actuators via properties configuration
Let us make below entries in application.properties to enable the managaement security and override the default role from ACTUATOR to ACTRADMIN to access the management endpoints. Also, we are configuring username/password for ACTRADMIN role as act/act.
management.security.enabled=true
security.user.name=act
security.user.password=act
management.security.roles=ACTRADMIN
management.context-path=/manage
Also, add following maven dependencies to pom.xml to use default login feature of spring boot during unauthorised access.
<dependency>
	<groupId>org.springframework.boot</groupId>
	<artifactId>spring-boot-starter-security</artifactId>
</dependency>
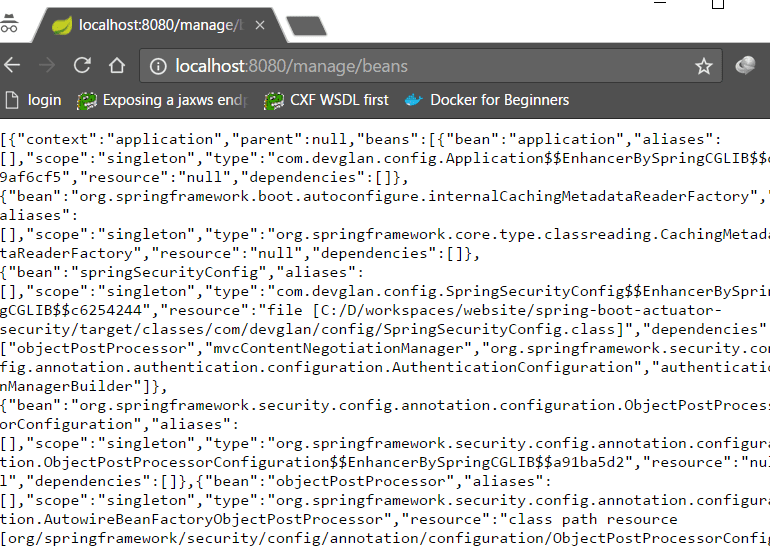
Now let us try accessing the restricted endpoints at localhost:8080/manage/beans Remember, we got unauthorised exception while accessing restricted endpoints before. This time, you will be prompted for username/password. Enter the username and password as configured in application.properties as act/act and you can see all the beans listed similar to below screenshot.
 Other Interesting Posts
Spring Boot Actuator Complete Guide
Spring Boot Actuator  Rest Endpoints Example
Spring Boot JWT Auth
Spring Boot Security OAuth2 Example
Spring 5 Features and Enhancements
Spring Boot Thymeleaf Example
Spring Boot Security Hibernate Example with complete JavaConfig
Securing REST API with Spring Boot Security Basic Authentication
Spring Boot Security Password Encoding using Bcrypt Encoder
Adding Management Security to Actuators by extending WebSecurityConfigurerAdapter
Now if you do not want to hard code these security configurations in properties file then you need to extend WebSecurityConfigurerAdapter and provide your custom authentication mechanism. Here we will be using inMemoryAuthentication to provide authentication. To configure in hibernate with DB authentication check Spring Boot Security Hibernate Example. We have management user/password as admin/admin this time.
package com.devglan.config;

import org.springframework.beans.factory.annotation.Autowired;
import org.springframework.security.config.annotation.authentication.builders.AuthenticationManagerBuilder;
import org.springframework.security.config.annotation.web.configuration.EnableWebSecurity;
import org.springframework.security.config.annotation.web.configuration.WebSecurityConfigurerAdapter;

@Configuration
public class SpringSecurityConfig extends WebSecurityConfigurerAdapter {

    @Autowired
    public void configureGlobal(AuthenticationManagerBuilder auth) throws Exception {
        auth.inMemoryAuthentication().withUser("admin").password("admin").roles("ACTRADMIN");

    }
}
Now, remove or comment the properties configuration security.user.name and security.user.password defined in application.prperties and hit th url localhost:8080/manage/beans. Again, you will be prompted for user/password and enter admin/admin this time and again you can see the same result.
Overriding Default Restricted Endpoints
By default, endpoints /health and /info are non-restricted but once you have enabled the security, you will have still access to /health endpoint but you can only see the status. To have full access to /health endpoint without actuator admin role, you need to configure it as below in application.properties.
endpoints.health.sensitive=false
Also, you can make other restricted endpoints public. For example following configuration will make /beans endpoint as public.
endpoints.beans.sensitive=false
Conclusion
I hope this article served you that you were looking for. If you have anything that you want to add or share then please share it below in the comment section.
