This post is about integration of spring boot mvc with jsp.Here, we will be developing a spring MVC boot app in integration with jsp using spring controller.We will be using tomcat-embed-jasper artifact to render jsp.So let us start by defining our maven dependencies first.
Project Structure

Maven Dependencies
tomcat-embed-jasper: This is the artifact which is actually required to render .jsp pages in spring boot app.
<?xml version="1.0" encoding="UTF-8"?>
<project xmlns="http://maven.apache.org/POM/4.0.0" xmlns:xsi="http://www.w3.org/2001/XMLSchema-instance"
    xsi:schemaLocation="http://maven.apache.org/POM/4.0.0 http://maven.apache.org/xsd/maven-4.0.0.xsd">
    <modelVersion>4.0.0</modelVersion>

    <groupId>com.devglan</groupId>
    <artifactId>spring-boot-jsp-example</artifactId>
    <version>0.1.0</version>

    <properties>
        <tomcat.version>8.0.3</tomcat.version>
		<start-class>spring-boot-example.Application</start-class>
    </properties>

	<parent>
        <groupId>org.springframework.boot</groupId>
        <artifactId>spring-boot-starter-parent</artifactId>
        <version>1.3.3.RELEASE</version>
    </parent>

    <dependencies>
		<dependency>
            <groupId>org.springframework.boot</groupId>
            <artifactId>spring-boot-starter-web</artifactId>
        </dependency>

		<dependency>
            <groupId>org.springframework.boot</groupId>
            <artifactId>spring-boot-starter-tomcat</artifactId>
        </dependency>

		<dependency>
            <groupId>javax.servlet</groupId>
            <artifactId>jstl</artifactId>
		</dependency>

		<dependency>
            <groupId>org.apache.tomcat.embed</groupId>
            <artifactId>tomcat-embed-jasper</artifactId>
		</dependency>

    </dependencies>

</project>
Spring Bean Configuration
SpringBootServletInitializer enables process used in Servlet 3.0 using web.xml
EnableAutoConfiguration This will help apring boot to automatically identify how to configure Spring, based on the jar dependencies that we have added. Since spring-boot-starter-web added Tomcat and Spring MVC, the auto-configuration will assume that we are developing a web application and setup Spring accordingly.
Application.javapackage com.devglan.config; import org.springframework.boot.SpringApplication; import org.springframework.boot.autoconfigure.EnableAutoConfiguration; import org.springframework.boot.builder.SpringApplicationBuilder; import org.springframework.boot.context.web.SpringBootServletInitializer; import org.springframework.context.annotation.ComponentScan; import org.springframework.context.annotation.Configuration; import org.springframework.context.annotation.Import; @Configuration @ComponentScan(basePackages = "com.devglan") @Import({BeanConfig.class, WebConfig.class}) @EnableAutoConfiguration public class Application extends SpringBootServletInitializer { private static ClassapplicationClass = Application.class; public static void main(String[] args) { SpringApplication.run(Application.class, args); } @Override protected SpringApplicationBuilder configure(SpringApplicationBuilder application) { return application.sources(applicationClass); } }
 Other Interesting Posts
Spring MVC Angularjs Integration with complete JavaConfig
Spring Hibernate Integration with complete JavaConfig
Spring Junit Integration with complete JavaConfig
Spring Ehcache Cacheable Example with complete javaConfig
Spring Boot Thymeleaf Example
Spring Boot Security Redirect after Login with complete JavaConfig
Spring Security Hibernate Example with complete JavaConfig
Securing REST API with Spring Security Basic Authentication
Spring Boot Security Custom Form Login Example
Spring JMS Activemq Integration with Spring Boot
Websocket spring Boot Integration with complete JavaConfig
Maintaining Spring Session during Websocket Connection
We have implemented WebApplicationInitializer.java to configure the ServletContext programmatically.
ApplicationInitializer.javapackage com.devglan.config; import javax.servlet.ServletContext; import javax.servlet.ServletException; import javax.servlet.ServletRegistration; import org.springframework.web.WebApplicationInitializer; import org.springframework.web.context.support.AnnotationConfigWebApplicationContext; import org.springframework.web.servlet.DispatcherServlet; public class ApplicationInitializer implements WebApplicationInitializer { public void onStartup(ServletContext container) throws ServletException { AnnotationConfigWebApplicationContext ctx = new AnnotationConfigWebApplicationContext(); ctx.setServletContext(container); ServletRegistration.Dynamic servlet = container.addServlet("dispatcher", new DispatcherServlet(ctx)); servlet.setLoadOnStartup(1); servlet.addMapping("/"); } }BeanConfig.java
Defining this bean configuration is the main important part which will register the view resolver and also define the JstlView class.
package com.devglan.config;

import org.springframework.context.annotation.Bean;
import org.springframework.context.annotation.Configuration;
import org.springframework.web.servlet.view.InternalResourceViewResolver;
import org.springframework.web.servlet.view.JstlView;

@Configuration
public class BeanConfig {

    @Bean
    public InternalResourceViewResolver setupViewResolver()  {
        InternalResourceViewResolver resolver =  new InternalResourceViewResolver();
        resolver.setPrefix ("/ui/jsp/");
        resolver.setSuffix (".jsp");
        resolver.setViewClass (JstlView.class);
        return resolver;
    }
}
By default Spring Boot will serve static content from a directory called /static (or /public or /resources or /META-INF/resources) in the classpath or from the root of the ServletContext. But here we have defined out custom folder structure for static contents, hence it is required to tell Spring boot about how to render static content.
package com.devglan.config;
import org.springframework.context.annotation.Configuration;
import org.springframework.web.servlet.config.annotation.ResourceHandlerRegistry;
import org.springframework.web.servlet.config.annotation.WebMvcConfigurerAdapter;

@Configuration
public class WebConfig extends WebMvcConfigurerAdapter {

	@Override
	public void addResourceHandlers(final ResourceHandlerRegistry registry) {
		registry.addResourceHandler("/*.js/**").addResourceLocations("/ui/static/");
		registry.addResourceHandler("/*.css/**").addResourceLocations("/ui/static/");
	}

}
Following is the model class with getters and setters.
User.javapackage com.devglan.model; public class User { private String name; private String address; private String email; public String getName() { return name; } public void setName(String name) { this.name = name; } public String getAddress() { return address; } public void setAddress(String address) { this.address = address; } public String getEmail() { return email; } public void setEmail(String email) { this.email = email; } }
Now let us define our controller that will serve the response to the client. Here we have hardcoded some user details.
DashboardController.javapackage com.devglan.controller; import java.util.Arrays; import java.util.List; import org.springframework.stereotype.Controller; import org.springframework.web.bind.annotation.RequestMapping; import org.springframework.web.bind.annotation.RequestMethod; import org.springframework.web.servlet.ModelAndView; import com.devglan.model.User; @Controller public class DashboardController { @RequestMapping(value = "/welcome", method = RequestMethod.GET) public ModelAndView welcome() { ModelAndView model = new ModelAndView(); model.setViewName("welcome"); return model; } @RequestMapping(value = "/dashboard", method = RequestMethod.GET) public ModelAndView dashboard() { ModelAndView model = new ModelAndView(); model.addObject("users", getUsers()); model.setViewName("dashboard"); return model; } private ListgetUsers() { User user = new User(); user.setEmail("johndoe123@gmail.com"); user.setName("John Doe"); user.setAddress("Bangalore, Karnataka"); User user1 = new User(); user1.setEmail("amitsingh@yahoo.com"); user1.setName("Amit Singh"); user1.setAddress("Chennai, Tamilnadu"); User user2 = new User(); user2.setEmail("bipulkumar@gmail.com"); user2.setName("Bipul Kumar"); user2.setAddress("Bangalore, Karnataka"); User user3 = new User(); user3.setEmail("prakashranjan@gmail.com"); user3.setName("Prakash Ranjan"); user3.setAddress("Chennai, Tamilnadu"); return Arrays.asList(user, user1, user2, user3); } }
Client Side
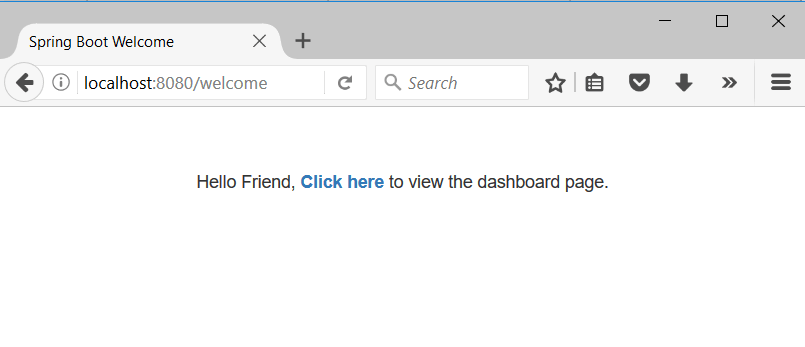
Following is the welcome page which will be rendered for /welcome request
welcome.jsp
<html>
<head>
    <title> Spring Boot Example</title>
<link href="/bootstrap.min.css" rel="stylesheet">
    <script src="/jquery-2.2.1.min.js"></script>
    <script src="/bootstrap.min.js"></script>
</head>
<body>
<div>
<div class="container" style="margin:50px">
    <div class="row text-center"><strong> User Details</strong></div>
        <p>Hello Friend, <a href="/dashboard"><strong>Click here</strong></a> to view the dashboard page.</p>
   </div>

</div>
</body>
</html>
Now let us define our dashboard.jsp
<%@ taglib prefix="c" uri="http://java.sun.com/jsp/jstl/core" %>
<html>
<head>
    <title> Spring Boot Example</title>
<link href="/bootstrap.min.css" rel="stylesheet">
    <script src="/jquery-2.2.1.min.js"></script>
    <script src="/bootstrap.min.js"></script>
</head>
<body>
<div>
<div class="container" style="margin:50px">
    <div class="row text-center"><strong> User Details</strong></div>
    <div class="row" style="border:1px solid green;padding:10px">
        <div class="col-md-4 text-center"><strong>Name</strong></div>
        <div class="col-md-4 text-center"><strong>Email</strong></div>
        <div class="col-md-4 text-center"><strong>Address</strong></div>
    </div>
        <c:forEach var="user" items="${users}">
            <div class="row" style="border:1px solid green;padding:10px">
            <div class="col-md-4 text-center">${user.name}</div>
            <div class="col-md-4 text-center" >${user.email}</div>
                <div class="col-md-4 text-center">${user.address}</div>
            </div>
        </c:forEach>

</div>
</div>
</body>
</html>
Run Application
1.Run Application.java as a java application.
2. Hit the url as http://localhost:8080/welcome.Following welcome.jsp page will be displayed.
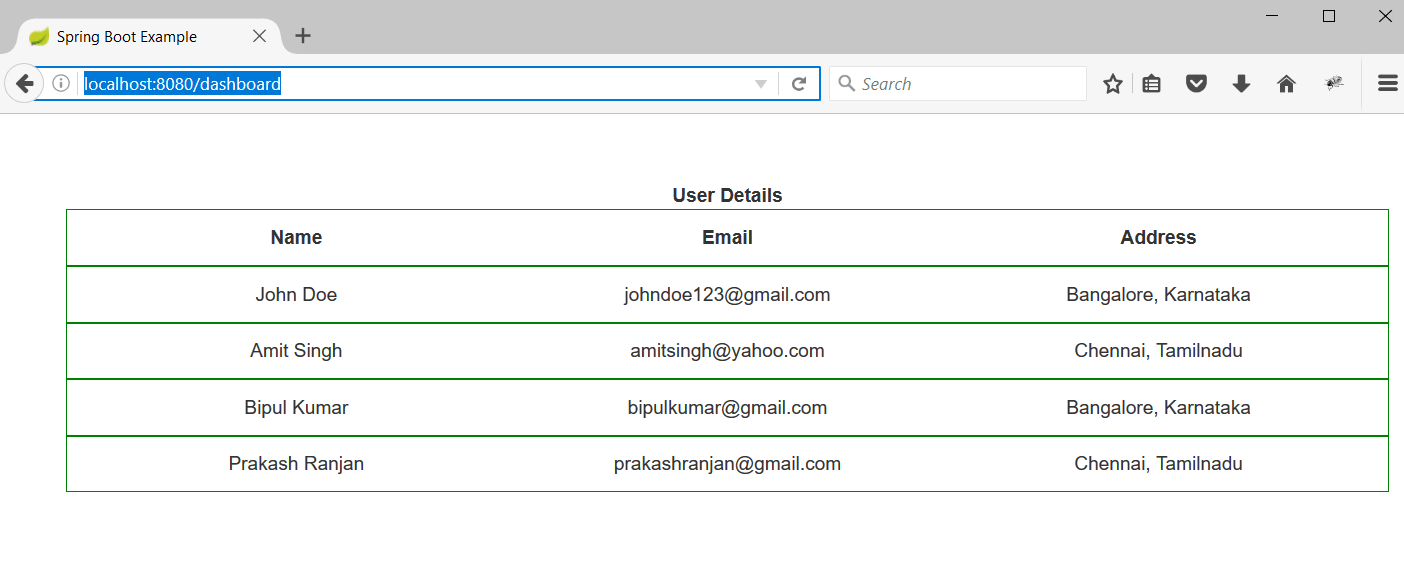
3.Once you click on the link, dashboard.jsp will appear as below:
Conclusion
I hope this article served you that you were looking for. If you have anything that you want to add or share then please share it below in the comment section.
